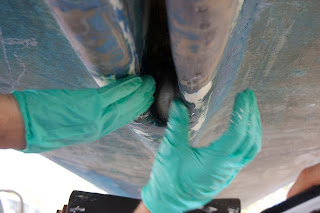
This weekend proved to be a very productive weekend, despite the 100+ degrees Fahrenheit temperatures that I should have grown accustomed to here in South Texas. After giving the entire week for the epoxy resin and hardener to cure, it was now time to go and peel the wax paper from the applied patch and view our results.
What I found under the wax paper pleased me to no end. It looked like the fiberglass had taken the right shape, and the epoxy had hardened like a rock. I proceeded to sand down the rough parts of the epoxy and smooth out the edges. This glass job had turned out better than I had imagined so far.
While I finished up prepping the keel trunk for another couple of layers of fiberglass, Anthony broke out the 4 HP gas powered pressure washer. We had noticed the week before that a little high pressure water seemed to remove the remnants of growth left behind on the bottom side.
He washed down the entire port side of the boat, working down to the last layers of ablative paint that had lost its ability to perform long ago. While spraying down around the beam, he uncovered a previous fiberglass repair job. Although the exterior portion of this other patch job left little to be desired in the way of aesthetics, it was very solid and posed no threat in our hull fairing efforts.
We waited a bit for the water to dry; which is not very long in the South Texas month of August. Once drained and dried, it was time to start on the next layers of fiberglass.
I measured out the next pieces of fiberglass. These subsequent layers were quite bit larger than the patch itself and were designed to provide structural support.
Since I had waited all week for the last application of epoxy resin and hardener to sure, I decided to mix a ratio of 5 parts West Systems 105 epoxy resin to 2 parts West Systems 206 slow hardener inside the house. What I soon discovered was that an ambient temperature of 75 degrees Fahrenheit will cure a batch of epoxy to a hard solid in about 15 minutes.
I had thought to myself that I would mix the epoxy and let it sit for a bit longer before applying it. When I went to pick up the brush to apply it, the resin had hardened to the consistency of a thick, hard plastic. The can had heated to around 120 degrees Fahrenheit, and the resin and brush were both useless. Lesson learned: Use the West System 209 extra slow hardener if you do not wish for the DHS to descend upon your abode for manufacturing chemical weapons. Apparently the extra slow hardener is rated to work in conditions above 90 degrees Fahrenheit.
Once I had remixed another batch of epoxy, I soaked the cut fiberglass and brushed the recently sanded surface of the previously applied patch.
I then carefully laid each layer of the patch over the surface, one at a time, and brushed over it with the new epoxy mix. Of course it was now time to wait.. again.. for it to dry.
I still had another sub-project that I had been waiting for the opportune time to complete. I had purchased a transom-mounted motor bracket months before that I wanted to use on my recently purchased beautifully maintained Nissan Marine 6 HP 4 stroke motor.
I gathered a few materials that would be necessary to properly mount the bracket to the transom:
1. One 2'x2' piece of plywood 1/2" thick
2. One 2'x2' piece of steel 1/16" thick
3. Four 5" long 5/16 carriage bolts
4. Four lock washers, nuts, and Teflon threaded nuts
I started by cutting the wood and steel sheet to match the size of the base plate on the motor bracket. I then used the bracket as a pattern to drill the holes through the wood and steel; using them both as a backing plate that would go on the inside of the transom.
Of course I verified that the holes on the motor bracket lined up with holes in the wood and steel plates. I then used the steel plate as a template from which mark the holes to be drilled through the transom.
I used 3M blue masking tape as a guide to make the holes level; running the tape parallel to the water line marked by the bottom side on the boat. I then verified the Y-axis left/right alignment by using my handy level app on my iPhone and marked off the holes, using the steel plate as a template.
It was quite a bit more difficult to verify that the Z-axis of the holes I was drilling were perfect. Since there was really no relative straight edge from which to work, we had to simply drill the holes out a bit larger than the actual bolts. Later these holes will be filled with epoxy to protect the wood within the transom itself.
Once drilled out, one of my friends climbed into the berth under the cockpit and squeezed his way up to the inside of the transom. As we ran through each bolt he put the wood plate on, with the steel over it. Once all the bolts had been run through he then slid on the lock washer, regular nut, and Teflon nut over each bolt.
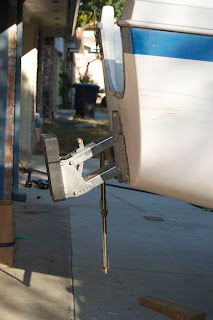
The end result: A beautifully mounted motor bracket, ready for the Nissan to hang from it.
Of course we will have to adjust the angle of the bracket, but as you can see the mount plate for the motor drops way down to the waterline. This should give us very efficient output from the 6 HP the motor puts out. Who knows; maybe we might even be able to reach hull speed now.
More to come...


