Monday, February 27, 2012

Round Nine

It has been another couple of weeks since I had a chance to update this blog with the status of the work that has been done.  A couple of cold and rainy weeks, followed by some mildly warm and sunny days makes for plenty of distractions.

We decided to fore-go some of the finer wet-sanding on the hull that would be needed to apply the gelcoat, and start sanding on the deck and cockpit of the boat.


It was a bit difficult to get into the crevices around the deck lip with just a normal sanding pad.  A bit of water applied over the boat did help in removing much of the paint the previous owner had applied.  Bits of the old paint job crumpled up under some water and .120 grit sandpaper, leading me to believe that the previous owner chose to use a latex based paint on the topside as well.  Why.. I can only surmise.

While I hand sanded around the edges of the boat, my buddy Rob went to town with a small Ryobi edge sander.  Carefully running the edge sander across the white trim in between the non-skid decking, the job was tedious but fruitful in its results.


The most trying spot seemed to be the trim around the forward bow hatch.  The old paint had been laid on over the base plates of the hatch hinges.  Iver the next week, we will end up removing the hatches and rest of the deck hardware to make sure we have a thorough and consistent base on which to start repainting.

While Rob focused on the bow portion of the boat, I set my attention towards to stern.


Starting in the cockpit tub itself, I used the trust Dewalt random orbital sander on the flat surface areas or white paint.  Occasionally spraying down the cockpit with a water hose, I was able to cover ground quickly. wet sanding all the way down to the original Hatteras Off-White fiberglass coloring. 


Following up with a sanding pad, a bit of hand scrubbing cleaned up the edges nicely.  After many hours of working off the old paint, we should be ready to start taping off the non-skid areas for repainting.

The last large portion of the top side that needed some sanding love was around the cabin.


Again, this was nothing that the random orbital and a hand sanding pad would not easily handle.  After about an hour of working around the cabin top, it looks like we are another step close to getting her finished and ready in time for the season.

More to come..

Wednesday, January 18, 2012

Round Eight

It has been at least a couple of months since I have updated this blog to show the amount of work done to the Clipper.  Between the sudden shifts of warm to cold weather, rainy days, and winter vacations, we have still managed to perform some impressive transformations to the boat... if I do say so myself.

We had left off at the point of raising the boat from each side to finish up the removal and sanding of the bottom coat.  With the bottom layer of ablative coat pulled from the fiberglass, it was time to lay down some Ready Strip.  This would remove any remaining paint particles and clean up the fiberglass.


A small can of this bad-boy can be found at most any marine parts supply store.  In our case we found it at West Marine for right around twenty five dollars.


We went to work by laying down a thin coat of Ready Strip all over the bottom of the boat, building it up thicker around the edges of the keel trunk and underneath where the bunks were laid across the hull.  Once set in after a couple of hours, a quick pressure wash removed both the applied stripper and any other bottom paint left behind.

The next step in our process was to apply an epoxy barrier coat to the bottom of the boat.


Again, out came the West System Epoxy and hardener.  We used the same 5:1 ratio for the epoxy to hardener mix, this time adding the 407 Low Density filler to thicken up the mix.  This powder-like filler is simply poured into the epoxy mix until it achieves a melted chocolate-like consistency, and creates an amazing fairing surface.

Once mixed, I simply rolled the epoxy coat all over the open surfaces of the hull.


When it came to the keel areas, I simply brushed on small amounts, building up layers over time.  After the barrier coat dried, we simply ran over it with 320 grit on the Dewalt random orbital sander to smooth it out in preparation for painting.


After sanding down the bottom, Anthony carefully laid down some painter's tape to mask off the area where we would be applying the bottom coat.  In this case I chose to go with the Interlux Bottom-Kote NT bottom paint.  The manufacturer described this as the perfect combination of both hard coating and ablative coating paints.


I have to admit, much like the Pre-Kote primer, Interlux's Bottom-Kote paint went a very long way, and dried in only minutes.  By the time we had reached one end of the boat, the bottom was ready to go back and lay down another coat.  We ended up rolling three coats over the bottom of the boat.


Once the tape was peeled up, the lines came out extremely straight.  With the bottom now finished, it was time to move on to painting the hull itself.


A buddy of mine has recently picked up an inexpensive HVLP spray gun from Northern Tools, and was anxious to try out its first use on the Clipper.  Who was I to argue?  I had four quarts of Interlux Brightside paint that needed to go on, and what better way than to spray?

After spending a couple of afternoons masking off the hull with tape and plastic and running over the primer with acetone to remove any contaminants, it looked like we were ready to give it a shot.


My buddy Rob started by taking the paint straight from the can, and laying down a thin coat to check the consistency of the paint, and the patterns of the spray gun.  For a first coat, we check for any splotching.


After seeing a few thick spray marks, we then thinned the paint a bit with Interlux 216 Special Thinner.  It only took a couple of ounces per paint can, but it seemed to mix very well and allow the paint to spray on very evenly.


The next coats that were laid down were almost as smooth as glass.  There would be a couple of spots it looked like we would need to buff out, but for the most part victory was ours.

After a couple of weeks of drying and curing, we pulled back the tape and started masking off the boot stripes.  This particular job looked like a simple roll and tip with Pettit's Easypoxy topside paint. 


The original color on the Clipper was something close to a Sapphire Blue, but we chose to go with Pettit's Burgundy for the boot strips.


Again, this particular brand seemed to go a lot further than I ever expected.  We rolled and tipped a single coat all the way around, waited a couple of days, and finished it off with a second coat.  I was pretty impressed with the self-setting ability of the paint to eliminate most of the brush marks.

With the boot stripes now finished off, we decided to go ahead and varnish and recover the trailer bunks.


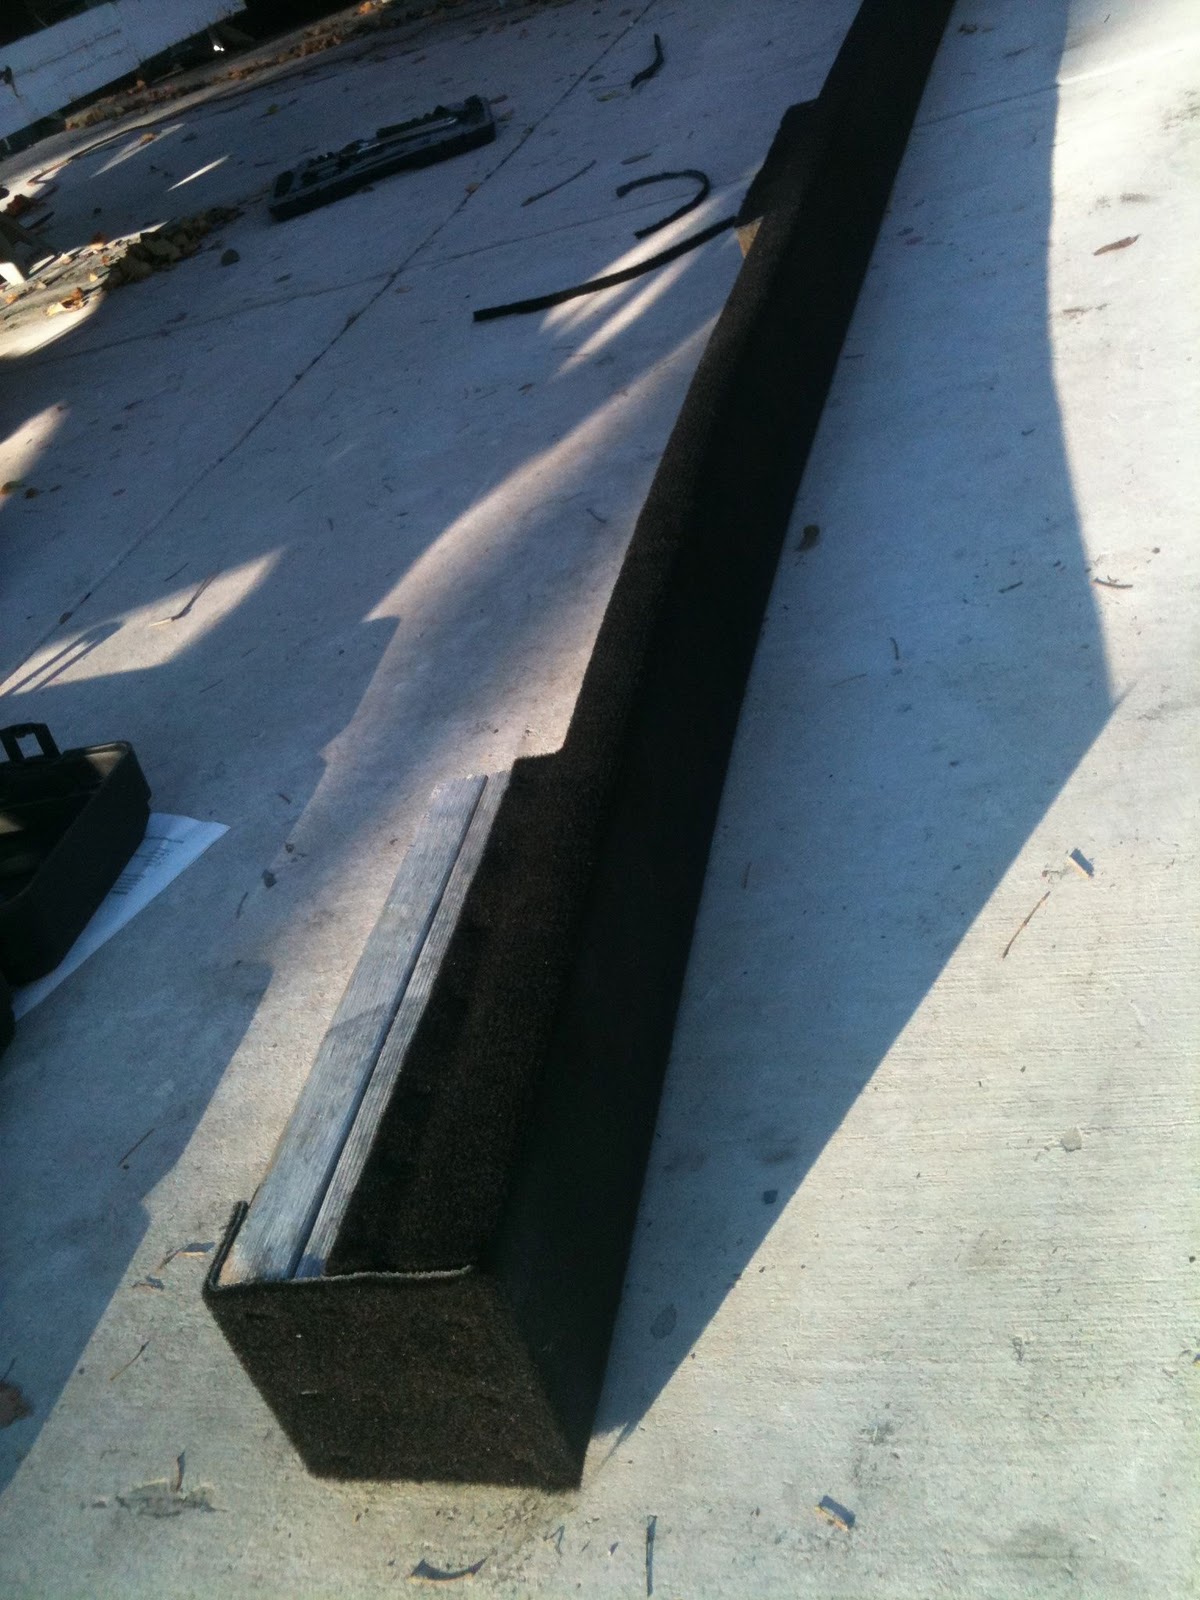
The kids helped out with the first part, spreading a light coat of varnish along each trailer bunk.  For about thirty dollars, we picked up some black indoor/outdoor carpet that looked perfect for covering the bunks.


Carefully cutting out the pattern, and using some 3M spray adhesive, we stuck the carpet strips to each bunk, stapling it down along the sides and bottom.  The resulting product, although not perfect, would be perfect for our newly painted bottom to rest on.


A few touch ups would be needed along the front of the bunks, but it looked like we were ready to re-attach the bunks to the trailer and lower the boat back on to our newly soft-carpeted bunks.


The next step in the process would be to fine sand and buff down the paint on the hull in preparation for gel-coating.

As always.. more to come.. stay tuned.

Friday, November 4, 2011

Round Seven..

After many unanswered calls to the fellow on the Southside of San Antonio with the boat hoist, we decided that we would go ahead and give a shot at lifting the Clipper off of the trailer; at least part of the way.

Since the neighborhood kids would not have a chance to play on the boat over the next few weeks, they decided to lend a hand at cleaning up the topside and deck.  I guess this would give them the last remaining hours on the boat that could be spared before they would have to vacate the premises.


After a while of hosing down the deck, and a bit of topside scrubbing.. it was now time to give Anthony's plan of trailer bunk replacements a shot.

Weeks earlier, I had gathered some various 2x4's and 4x4's that I had lying around in my backyard.  Combined with a few extra pieces of lumber that Pops had, we figured we had enough to contruct some sort of heavy support system.


The idea was to construct some 18 inch wooden cubes to support the pneumatic floor jacks that would raise the make shift bunks.  These cubes would be designed to support about a ton each.  We carefully placed these cubes underneath the front and rear bulkhead on the portside of the Clipper.


From here, we would place the jacks on top of the cube stands, and raise a single 16 foot long 2x6 on the inside of the existing bunk; thus displacing the weight of the bunk on to a new makeshift bunk.


The placement of the jacks had to be fairly close to where the bulkheads were located, as we did not want to put any undue load on the fiberglass of the hull.


Inch by inch, we slowly raised each floor jack, carefully listening for any stress cracking that might occur.  To our surprise, there was not even a peep from the hull.

After lifting over six inches off the outer bunk, Anthony and pops unfastened the retaining bolts for the trailer bunk and then removed the entire 14 foot section of 2x6 stretch from the trailer.  We now had ample room in which to work.


We now easily run the random orbital sander and surface solvent over these sections to fully prep the portside bottom of the hull for painting.


This also gave us the opportunity clean up the removed trailer bunk.  In the coming weeks, we will varnish, and carpet the bunk before replacing it.

After a couple hours of sanding the next day, the bottom looked ready to apply some solvent and clean it up.


With the boat raised I was also able to finally sand down a previous patch job I had found when previously removing paint from the hull.


Since this previous repair job was rock, solid, I simply needed to sand it smooth and refair the hull in this area.  Also, we would now be able to apply an epoxy barrier coat to the hull before applying the bottom paint.


With the portside all cleaned up now, we can clean it up, repaint it, and then do the starboard side over the next weekend.

She's getting closer to being put back on the water.  I can hardly wait.

Tuesday, October 25, 2011

Yet More Side Work..

I had a couple of weekday afternoons free and decided to go ahead and finish up some of the teak work and trailer work.  Previously I had sanded and refinished the tiller handle, grab rails, and companion way trim.  The old companion way hatch was an old piece of yellow pine plywood that had never even been sanded, much less stained or varnished.  The local hardware store had a few pieces of solid birch that looked like it would do the trick.  Using the original as a template, I made some straighter cuts, sanded it down, stained it with a moderate cherry mahogany, and replaced the hatch and trim to prevent any spillover from the onslaught of the rainy season ahead.


The new hatch and refinished trim definitely added to the classic look I was after in restoring the Clipper.  I knew the addition of the grab rails and tiller were definitely going to polish her off when we were finished.

Another annoyance on the list was the original trailer coupler.  This piece used an old style socket shield that slid over the coupler housing to lock onto the tow ball. 


Although it made for a strong grip around the tow ball, it became increasingly frustrating to unfasten the trailer from the tow ball at the end of a nice day of sailing.  It was finally time to replace this monstrosity with something a bit more.. modern?

A quick visit to Northern Tools yielded a galvanized butterfly style trailer coupler that I would use to attach to the trailer.  At first this seemed like a simple enough proposal.  But like many of the other upgrades I would like to perform on the boat, the path is not always straight nor easy.

The trailer extension that housed the original coupler had a couple of eyelets through which bolts were run to fasten the coupler.  These eyelets extruded almost a quarter of an inch on each side within the extension itself.  Since the new coupler was exactly fitted to the square stock steel tubing for the extension, these eyelets needed to be sheered off with an angle grinder.


My buddy Rob lent his expertise in metal works for this portion.  His proposal was to grind off the eyelets, shave some steel off the bottom of the extension, weld on the coupler, and then polish off and paint the new coupler and extension.

I have to say, the resulting product looked pretty damned good.


Though the photo above most likely does not do it justice, the old steel with the new coupler looked pretty nice again.


Rob even removed the old actuator arm for the old non-functioning surge brake unit, and rerouted the tow chains.  Now the Clipper was definitely ready to be moved for painting.

Stay tuned for more...

Tuesday, October 11, 2011

Round Six..

Yet another couple of weeks transpired before I could return to repairing the Clipper.  The weather had changed for the best, bringing in cooler temperatures along with the occasional torrential downpour.  Knowing of the eventual storms to come, I decided it was most likely a good idea to purchase a heavy duty tarp to cover over the cockpit.


With the tilt of the boat leading toward the bow due to the slant of the driveway, the self-balers would not have as much opportunity to perform their duties of successfully draining the cockpit.  I figured the tarp should help with keeping as much water out as possible.

While waiting to see what our next step might be in raising the boat off the trailer, I decided it was as good a time as any to fine sand the hull and apply some primer.


I acquired some Interlux Pre-Kote primer in grey.  I juggled the idea back and forth of using the white primer instead of the grey, but I surmised that this darker share of primer might help in spotting any areas of the hull that might require more sanding and fairing.

Anthony proved to be quite the handyman when it came to taping and masking off the boot stripes along the hull.  Even the curved areas along the bottom aft where the stripe became larger seemed to pose no real challenge.

 
I guess he had done this quite a few times before.

Once all of the masking was completed, I once again washed down the hull with soapy water, then rinsed with the pressure washer, and then wiped down the surface with a lint free cloth and a light solvent mix.

The surface was very smooth and ready to be primed.


The 6" foam rollers I had picked up for the job of priming worked remarkably well with the Pre-Kote product.  Little pressure was needed to spread the primer.  I was also quite surprised how far the primer went.  I was able to successfully paint a single coat over the entire port side of the hull with only half a quart.


The only issues I seemed to encounter were around the leading edge of the hull under the bow.


Because of existing trailer hardware that I could not remove from my path, I simply used a brush to tip off the edges.  Once I painted as many corners as I could access, I finished up the starboard side of the hull with the second half of the quart.


This was starting to look like a totally different boat from what I had original sailed.

Once again, I tipped of the edges of the starboard side and completed the single coat up to the leading edge of the hull.


It was now time to perform some trailer rewiring.

Anthony had previously removed the "original" trailer wiring that had been routed externally and zipped tied around the steel tubing along the length of the trailer.  I picked up a 50' spool of four color trailer wiring to make the wire run internally; what should have originally been done when the trailer was wired.

We started be drilling out the rear left side of the steel tubing with a metal cutting bit, and grinding it out to smooth it for the wires.


It was no easy task to drill through a 1/4" thick steel plate from the angle we had, but after some persistent pressure between me and Anthony, the steel finally gave way.

After removing the hitch coupler from the front of the trailer,  we found inside the tubing was an old bundle of trailer wiring that  had been run down both sides of the trailer.  It appeared that someone actually extended the length of the trailer to accommodate the Clipper, but left a run of burned and rusted wiring.  Why they did not choose to pull it all out and replace it instead of wiring from the outside is beyond me.

After pulling out the old bundle, I then ran a cable snake down the left side of the trailer, towards the hole we had drilled out.


Anthony then tied off and taped the new wire to the snake for me to fish back through the steel tubing.


From here, Anthony was able to use a set of water-proof couplers and some epoxy heat-shrink tubing to seal off the connections for the adapters and tail lights.

 After a bit of fussing with the connections and testing the run between the left and right tail lights,  it appeared we were now in business.


With some new trailer wiring and a good set of water-proof connections, we were now ready to get this boat transported over to a place where we could sand and paint the bottom.